StayingSustainable.com
Laying Out Your Own Solar Panel
That being said, once we have collected all of the materials, the next step is to layout the panel. This can be done by creating a to-scale drawing of what the panel will look like given the dimensions of the materials you are using. The panel built for this tutorial was laid out as shown, using a spacing of about 1/4” between panels.
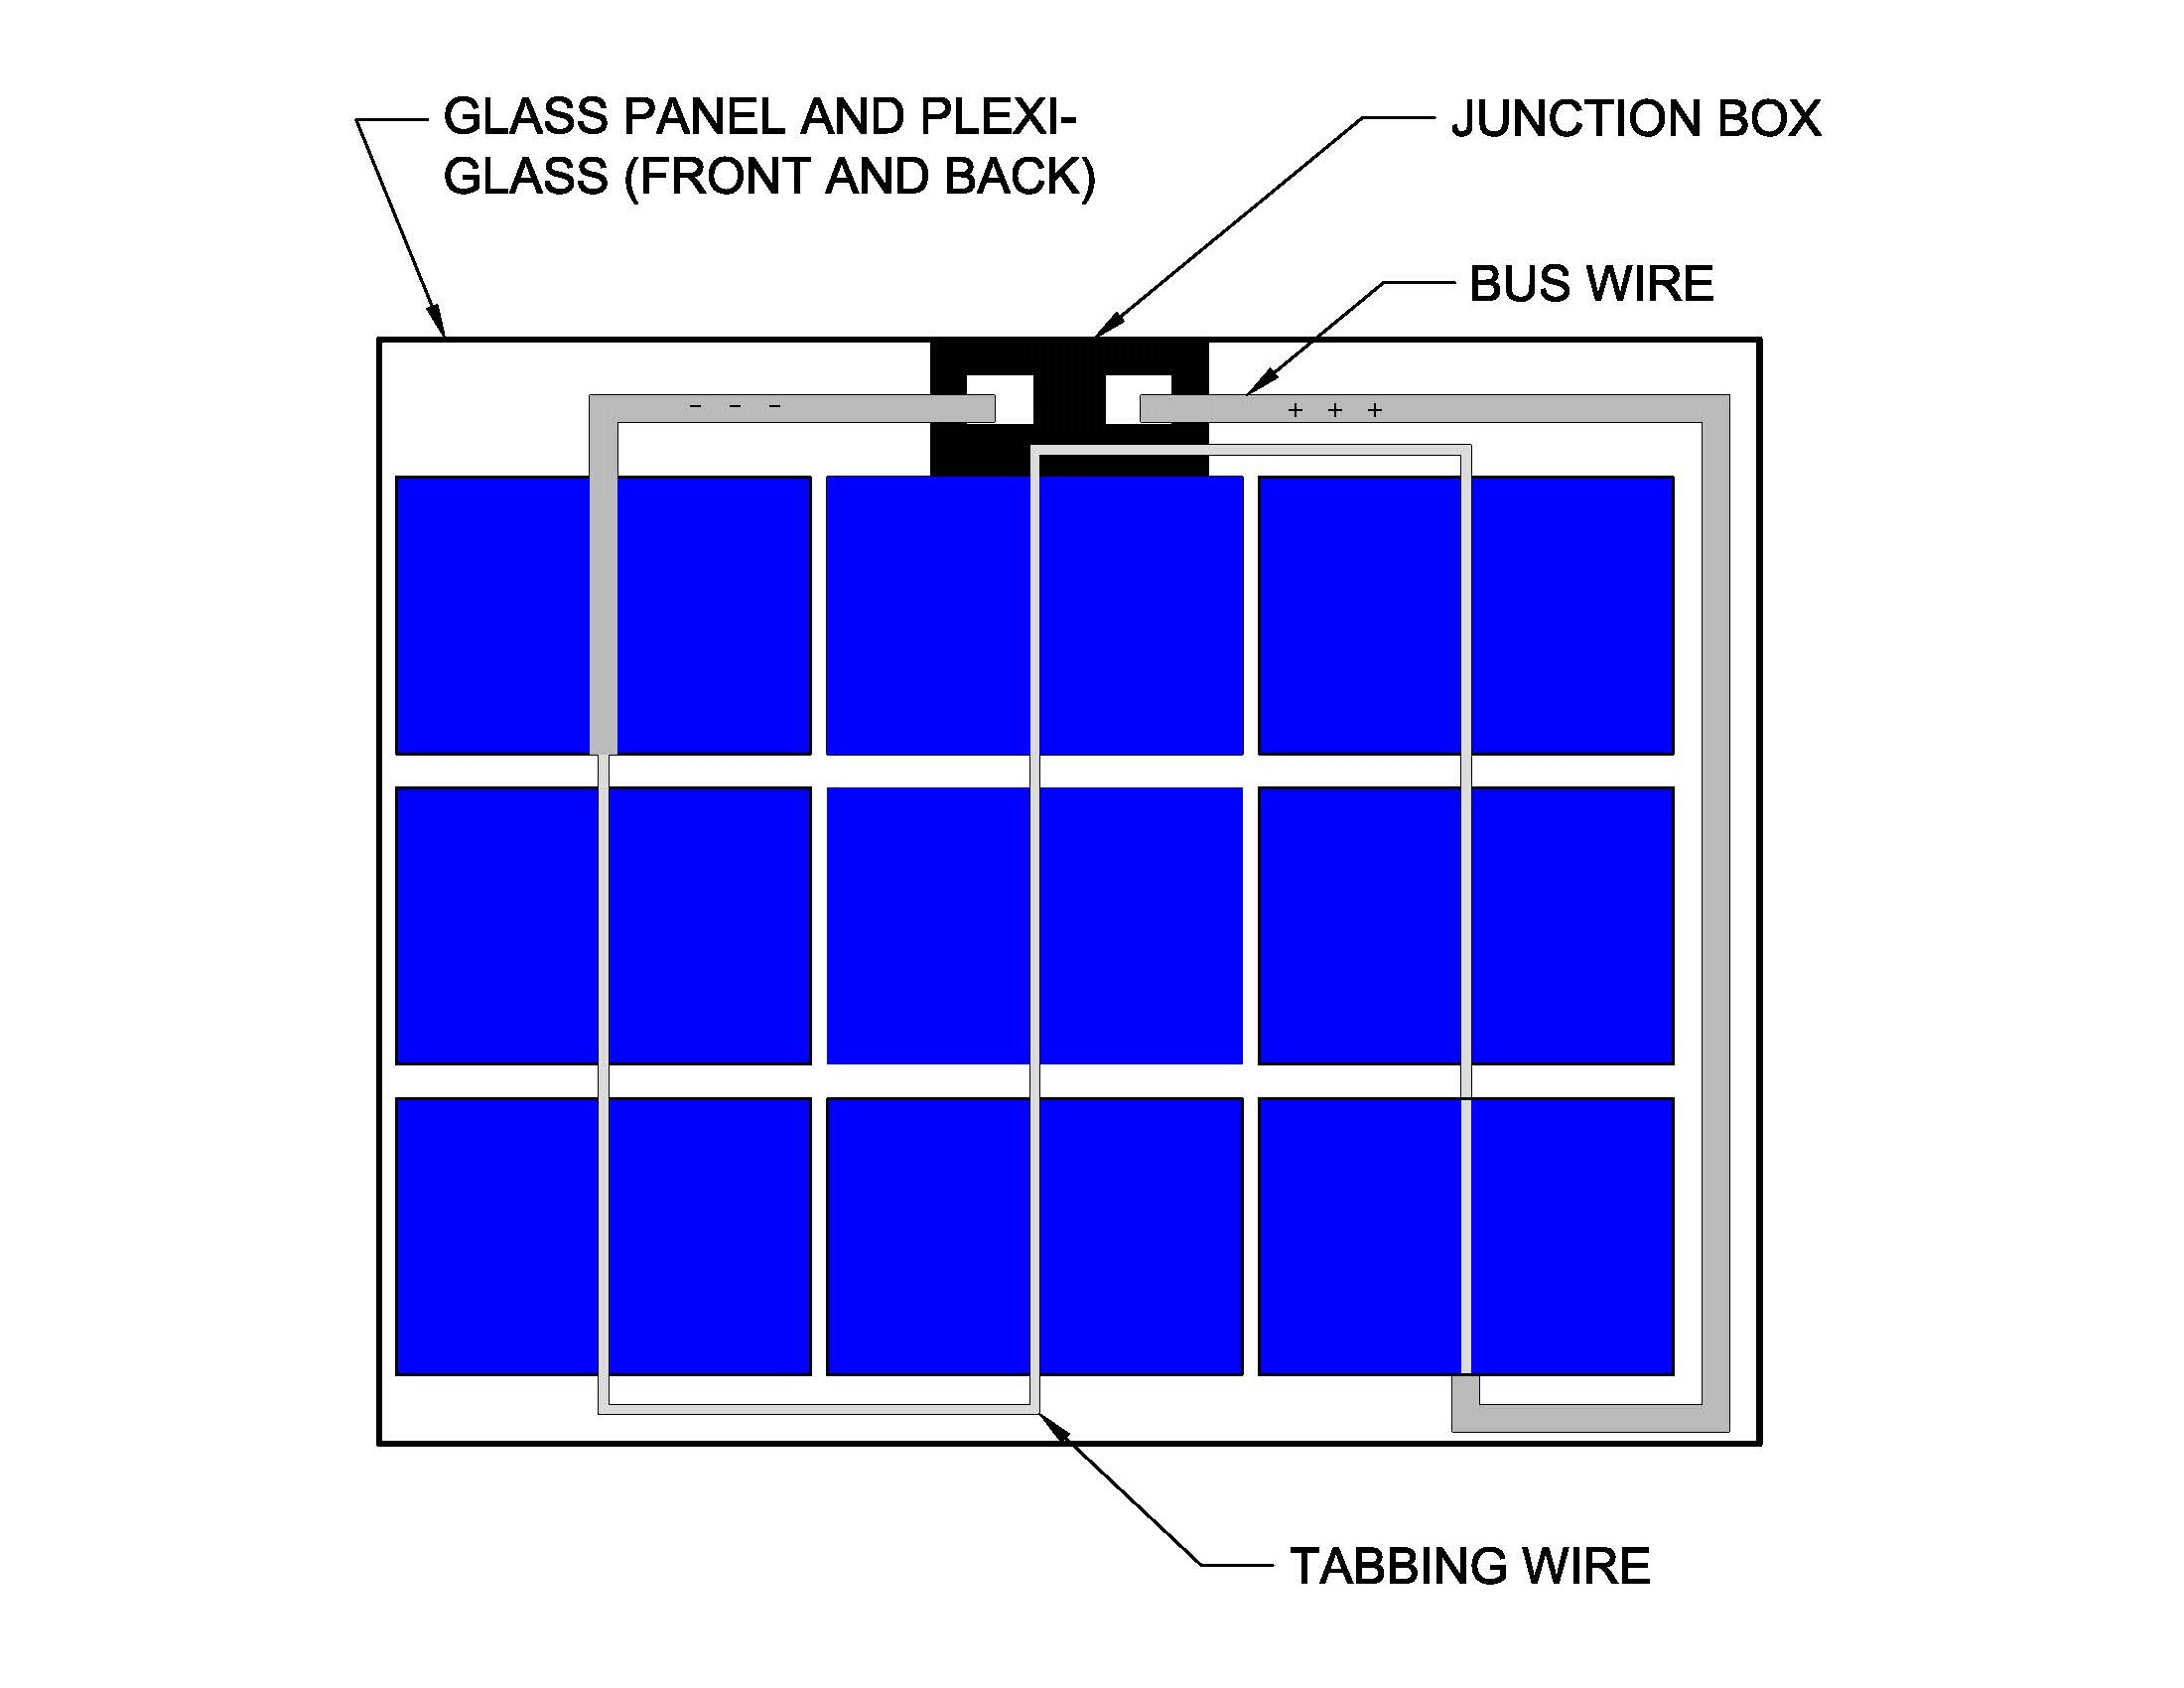
When laying out the panel, you will have to decide how you will get your positive and negative leads to the junction box as well. Notice on the picture above, that the buss wire is also depicted. The junction box will be on the back side of the panel. You’ll want to make sure you plan where you want it to be so that you can properly route your bus wires.
On a side note, it is typically best if you can have an even number of cell strings (rows of connected cells). That way your positive and negative leads end up on the same side and you don’t waste a whole bunch of buss wire. For this tutorial, size is the bigger concern.